Tous les niveaux de WheelMates forment un seul itinéraire continu à travers la maison du professeur, et connaître l'ordre des pièces avant de commencer vous évite de refaire les mêmes énigmes deux fois. Ce guide de tous les niveaux de WheelMates vous accompagne dans chaque pièce en séquence, du garage au sous-sol jusqu'au laboratoire caché, afin que vous sachiez toujours quel gadget apporter et quel interrupteur actionner ensuite. Comme le jeu sort le 1er septembre 2026 et que le Friend's Pass permet à un second joueur de rejoindre le jeu complet gratuitement, toute la solution de la maison WheelMates est conçue autour de la coopération à deux joueurs, même si les joueurs solo peuvent toujours terminer chaque niveau avec une planification minutieuse. Nous avons organisé ce guide des pièces de WheelMates selon l'ordre réel des pièces, et nous avons inclus les équipements de gadgets que les tests de la communauté rapportent comme rendant les sections les plus difficiles gérables. Si vous voulez une vue d'ensemble complète de la maison du professeur, ce guide de tous les niveaux de WheelMates est le point de départ idéal.
Aperçu de Tous les Niveaux de WheelMates : L'Agencement de la Maison
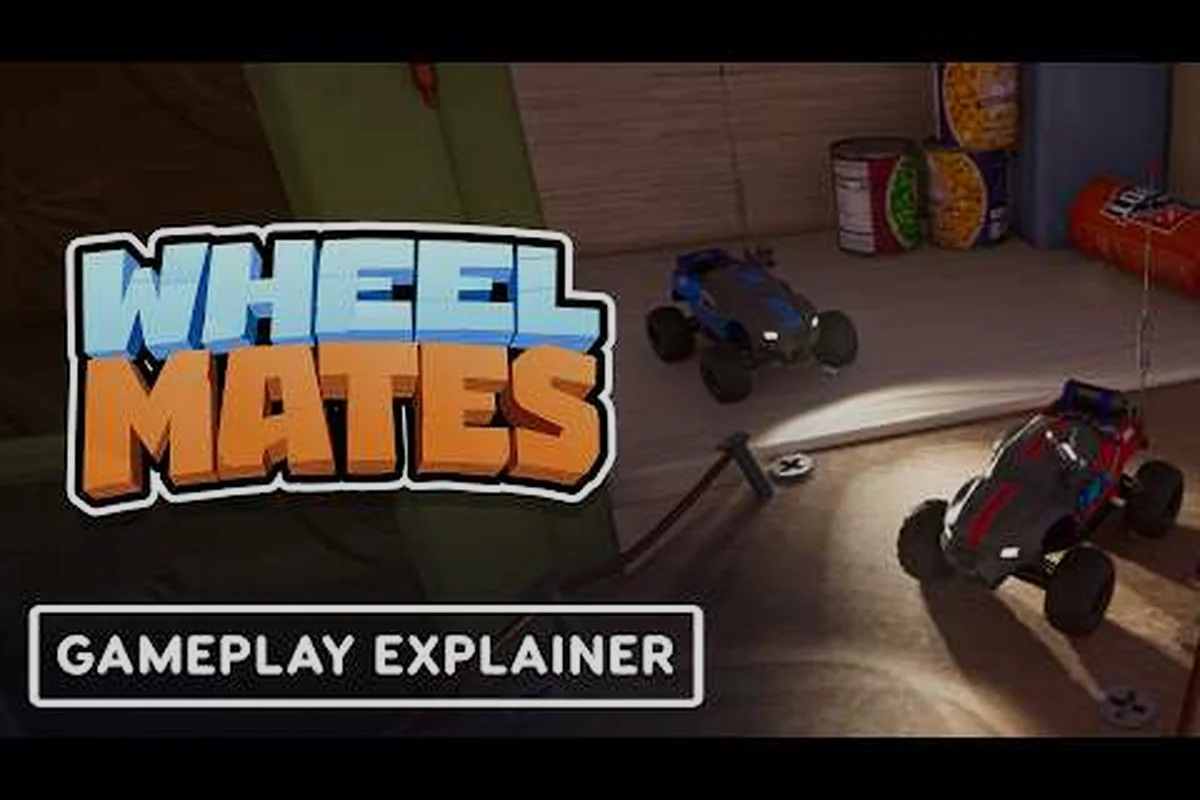
Tous les niveaux de WheelMates se déroulent à l'intérieur de la maison du professeur, qui fonctionne comme un hub continu plutôt qu'un menu d'étapes séparées. La bande-annonce officielle de présentation du gameplay montre les deux voitures télécommandées traversant le garage au sous-sol, la salle de stockage, le bureau, la cuisine et le salon avant d'atteindre le laboratoire, avec des pièces cachées disséminées en chemin qui nécessitent la résolution des deux voitures. Selon la page WheelMates sur Steam, le jeu est une aventure de conduite coopérative à deux joueurs, et l'ordre des pièces compte car chaque nouvelle zone introduit un gadget que la pièce suivante s'attend à ce que vous utilisiez. Les tests de la communauté sur la démo rapportent que la maison est principalement linéaire, mais chaque pièce cache une sortie secrète, c'est pourquoi le tableau des pièces ci-dessous se concentre d'abord sur l'itinéraire principal.
Voici la séquence des pièces que les tests de la communauté sur la démo ont rapportée jusqu'à présent :
| Pièce | Gadget introduit | Difficulté | Focus coopératif |
|---|---|---|---|
| Garage | corde à balancer | Débutant | mouvement de base |
| Stockage | roues magnétiques | Débutant | escalade murale |
| Couloir | aimant de préhension | Intermédiaire | déplacement d'objets |
| Cuisine | gadgets combinés | Intermédiaire | énigmes de timing |
| Salon | tous les gadgets | Avancé | chemins de pièces cachées |
| Laboratoire | combinaisons complètes | Avancé | énigmes finales |
La progression est conçue pour que chaque pièce enseigne une mécanique avant que la pièce suivante ne la combine avec quelque chose de nouveau, ce qui maintient la courbe de difficulté fluide même pour les joueurs qui n'ont jamais touché à une énigme coopérative. Une fois que vous comprenez cet agencement, le reste de ce guide de tous les niveaux de WheelMates devient une question de suivi des exigences des gadgets pièce par pièce, et vous pouvez planifier votre itinéraire avant même de commencer à conduire.
Guide des Niveaux de WheelMates : Analyse Pièce par Pièce
Maintenant que vous connaissez l'agencement général, ce guide des niveaux de WheelMates décompose la maison en pièces individuelles, car chaque espace a son propre ensemble d'énigmes et une priorité de gadget différente. Les rapports de la communauté montrent que les deux premières pièces sont indulgentes, mais la difficulté augmente rapidement une fois que les roues magnétiques apparaissent, nous recommandons donc de terminer le couloir et la salle de stockage avant de tenter quoi que ce soit d'autre.
Le Couloir et la Salle de Stockage
Le couloir est la pièce tutoriel, et il vous enseigne le gadget corde à balancer, qui permet à une voiture d'attacher une ligne tandis que l'autre se balance au-dessus d'un vide. La salle de stockage introduit ensuite les roues magnétiques, qui permettent aux voitures de rouler sur les murs verticaux et au plafond, et c'est là que la plupart des nouveaux joueurs se bloquent car l'angle de la caméra peut cacher le mur suivant. Selon les tests de la communauté, ces premières pièces sont conçues pour enseigner la boucle de base de la conduite, du balancement et de la préhension, il n'y a donc aucune raison de les précipiter. Si vous voulez tous les détails sur les espaces de l'étage supérieur, la solution du grenier couvre le bureau et le couloir plus en profondeur.
La Cuisine et le Salon
La cuisine introduit l'aimant de préhension, et c'est la première pièce qui nécessite vraiment une communication, car une voiture doit soulever un objet tandis que l'autre traverse le déclencheur. Le salon combine ensuite les trois gadgets dans un seul espace, avec une porte qui reste bloquée jusqu'à ce que vous activiez les bons interrupteurs dans le bon ordre. Les rapports de la communauté suggèrent que la pièce cachée du salon est la plus facile à manquer, car elle se trouve derrière une bibliothèque qui ne s'ouvre que lorsque les deux voitures se tiennent sur la même plaque de pression en même temps. Si vous jouez en solo, vous devrez passer rapidement d'une voiture à l'autre, c'est pourquoi le mode écran partagé est la manière recommandée de vivre ce guide des niveaux de WheelMates.
Solution de la Maison WheelMates : Gadgets et Mécaniques
Chaque pièce de la solution de la maison WheelMates dépend des trois mêmes gadgets, donc les maîtriser tôt vous évite de réapprendre les mécaniques dans chaque pièce ultérieure. La bande-annonce officielle et la couverture d'IGN montrent toutes deux la même boucle de base : vous conduisez, vous vous balancez et vous attrapez, et les pièces ne deviennent plus difficiles que lorsque ces actions se combinent. Voici une comparaison rapide des trois gadgets et de ce pour quoi chacun est le meilleur, basée sur les tests de la communauté de la démo :
| Gadget | Meilleur usage | Faiblesse | Première pièce |
|---|---|---|---|
| Corde à balancer | traverser les vides et les ascensions verticales | nécessite un point d'ancrage fixe | Couloir |
| Roues magnétiques | conduite sur murs et plafonds | lent sur terrain plat | Stockage |
| Aimant de préhension | déplacer des objets et des interrupteurs | nécessite une seconde voiture | Cuisine |
La corde à balancer est votre outil de déplacement, et elle fonctionne mieux lorsque vous avez un point d'ancrage clair, comme un mur ou un rail au plafond, car l'arc de balancement détermine la distance que vous pouvez parcourir. Les roues magnétiques sont le gadget le plus délicat à maîtriser, car elles inversent votre sens de la gravité et vous obligent à lire la pièce sous un angle différent, mais elles ouvrent également les pièces cachées que la plupart des joueurs manquent lors de la première partie. L'aimant de préhension est le gadget le plus sûr, et il est presque toujours associé à une seconde voiture, ce qui est exactement la raison pour laquelle le Friend's Pass existe afin qu'un partenaire puisse rejoindre le jeu complet sans payer. Comme chaque gadget a une force et une faiblesse claires, la meilleure stratégie est de garder une voiture au sol pendant que l'autre utilise les roues, ce qui est l'approche que la plupart des speedrunners de la communauté utilisent pour gagner du temps.
Solution du Laboratoire WheelMates : Les Pièces de Fin de Jeu
Le dernier tronçon de la solution du laboratoire WheelMates est l'endroit où le jeu cesse de vous tenir la main, et les pièces ici s'attendent à ce que vous utilisiez chaque gadget en séquence. Le laboratoire est la plus grande zone de la maison, et il contient la chambre de test cachée, qui n'apparaît qu'après avoir résolu un ensemble d'interrupteurs dans le laboratoire principal. Les rapports de la communauté disent que le laboratoire est divisé en trois sous-pièces, et chacune teste une combinaison différente des gadgets que vous avez appris plus tôt, donc les pics de difficulté sont intentionnels.
Le Laboratoire Principal
Le laboratoire principal est une pièce à plusieurs niveaux qui nécessite les roues magnétiques pour grimper aux murs tandis que la seconde voiture utilise l'aimant de préhension pour maintenir une plateforme en place. L'astuce est que la plateforme ne reste levée que pendant une courte fenêtre, vous devez donc coordonner les deux voitures avant qu'elle ne tombe, et c'est là que la plupart des équipes coopératives échouent lors de la première tentative. La présentation du gameplay d'IGN montre exactement cette séquence, et c'est l'exemple le plus clair de la façon dont le jeu s'attend à ce que les deux joueurs agissent au même moment.
La Chambre de Test Cachée
La chambre de test cachée est la pièce optionnelle qui récompense le plus, et elle se déverrouille lorsque vous déplacez trois orbes lumineux dans les bonnes positions dans le laboratoire principal. Une fois la chambre ouverte, vous faites face à la pièce la plus difficile du jeu, qui combine la corde à balancer et les roues magnétiques dans une seule ascension verticale avec un timing serré. Si vous bloquez sur l'une des énigmes du laboratoire, le guide des solutions d'énigmes détaille chacune d'elles étape par étape, et c'est la ressource vers laquelle la plupart des joueurs se tournent lorsque le timing du laboratoire devient déroutant.
Voici un résumé des pièces du laboratoire et des combinaisons de gadgets dont chacune a besoin :
| Pièce du laboratoire | Combinaison de gadgets | Pression temporelle | Récompense clé |
|---|---|---|---|
| Laboratoire principal | roues + préhension | Moyenne | Clé du laboratoire |
| Chambre de test | roues + balancement | Élevée | Objet de collection caché |
| Pièce finale | les trois | Élevée | Fin |
Le laboratoire est ce que le jeu a de plus proche d'un combat de boss, et il vous demande d'utiliser les trois gadgets dans une seule séquence continue, donc la communauté recommande de pratiquer chaque gadget dans les pièces précédentes avant de tenter le dernier tronçon.
Guide des Pièces de WheelMates : Stratégies Coopératives et Raccourcis
Cette dernière section du guide des pièces de WheelMates se concentre sur les stratégies pratiques qui rendent les pièces les plus difficiles plus faciles, et la plus importante est la communication. Comme le jeu est conçu pour la coopération à deux joueurs, la communauté rapporte que les équipes les plus rapides assignent un joueur au mouvement et l'autre aux objets, et elles ne changent jamais de rôle en cours de pièce. La personnalisation des personnages est purement esthétique, vous pouvez donc y passer du temps sans vous soucier du gameplay, et le support du Steam Deck signifie que vous pouvez jouer à toute la maison en déplacement.
-
Assignez les rôles tôt — décidez qui conduit et qui attrape avant que l'énigme ne commence, car changer de rôle en cours de pièce fait perdre du temps.
-
Utilisez le Friend's Pass — le pass gratuit permet à un partenaire de rejoindre le jeu complet, ce qui est le moyen le plus simple de terminer les pièces coopératives.
-
Cherchez les pièces cachées — chaque pièce a une sortie secrète, et la chambre de test cachée est la plus précieuse.
-
Mémorisez l'arc de balancement — la corde à balancer a un arc fixe, vous pouvez donc apprendre le timing d'atterrissage pour chaque pièce.
La communauté note également que les sections les plus difficiles de la maison sont le salon et le laboratoire, et le guide pour terminer la maison détaille ces sections en profondeur. Le jeu fonctionne sous Windows et supporte le Steam Deck, vous pouvez donc jouer à tout le guide des pièces de WheelMates en déplacement, et le mode écran partagé fonctionne avec une seule manette pour le jeu local en coopération.
Questions Fréquentes
Combien de pièces y a-t-il dans tous les niveaux de WheelMates ?
Tous les niveaux de WheelMates sont organisés comme un seul itinéraire continu à travers la maison du professeur, et la communauté rapporte environ six pièces principales plus une chambre bonus. Le nombre exact peut varier selon la version, mais la séquence des pièces est la même pour tout le monde, et le laboratoire est toujours la zone finale.
Ai-je besoin d'un second joueur pour terminer le jeu ?
Non, le jeu est conçu pour la coopération à deux joueurs, mais les joueurs solo peuvent passer d'une voiture télécommandée à l'autre. Le Friend's Pass permet à un partenaire de rejoindre le jeu complet gratuitement, et la communauté rapporte que les pièces du laboratoire sont beaucoup plus faciles avec un second joueur, donc le mode coopératif est recommandé.
Quelle est la pièce la plus difficile du jeu ?
La chambre de test cachée dans le laboratoire est la plus difficile, car elle combine la corde à balancer et les roues magnétiques dans une seule ascension verticale. Les rapports de la communauté disent que le timing est le principal défi, donc pratiquer les roues magnétiques dans la salle de stockage aide beaucoup avant de tenter cette pièce.
Puis-je jouer à WheelMates sur le Steam Deck ?
Oui, la page Steam officielle liste le support du Steam Deck, et le jeu fonctionne également sous Windows. Le mode écran partagé fonctionne avec une seule manette, vous pouvez donc jouer à tout le guide de tous les niveaux de WheelMates sur l'appareil avec un ami.